In the realm of electrical installations, junction boxes play a critical role in connecting and protecting wires. When it comes to outdoor applications or environments prone to moisture and dust, waterproof junction boxes are essential. Proper installation of these junction boxes is crucial to ensure optimal performance, safety, and longevity of the electrical system. This guide delves into the best practices for installing waterproof junction boxes, empowering you to safeguard your electrical connections with confidence.
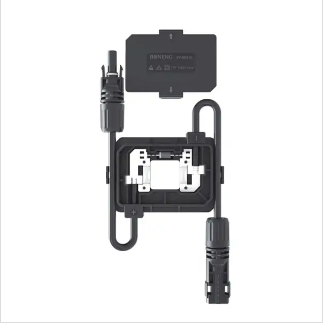
1. Select the Right Junction Box for Your Application
The first step towards a successful installation is choosing the appropriate junction box for your specific application. Consider factors such as the number of cables to be connected, the size of the cables, and the environmental conditions the junction box will be exposed to. Ensure the IP rating of the junction box is suitable for the anticipated moisture and dust levels.
2. Prepare the Installation Site
Before mounting the junction box, carefully select the installation location. Choose a site that is easily accessible for future maintenance and inspection. Ensure the mounting surface is clean, dry, and free from debris. If the surface is uneven, use appropriate shims or brackets to create a level mounting plane.
3. Mount the Junction Box Securely
Securely mount the junction box to the prepared surface using the provided mounting hardware. Follow the manufacturer’s instructions for proper installation and torque specifications. Ensure the junction box is firmly attached and will not vibrate or loosen due to external forces.
4. Prepare the Cables for Connection
Before connecting the cables, ensure they are properly stripped to expose the correct amount of conductor wire. Use appropriate cable connectors or terminals that match the wire size and are compatible with the junction box.
5. Make Proper Cable Connections
Carefully insert the stripped wires into the cable connectors or terminals inside the junction box. Ensure the connections are tight and secure to prevent loose wires and potential electrical hazards. Use appropriate tools for crimping or tightening connections as per the manufacturer’s instructions.
6. Seal Cable Entry Points and Conduits
Utilize the provided sealing glands or grommets to seal the cable entry points and any conduits connected to the junction box. Ensure a tight and watertight seal to prevent moisture ingress and maintain the IP rating of the junction box.
7. Secure the Junction Box Cover
Once all connections are made and cable entry points are sealed, securely fasten the junction box cover. Use appropriate screws or latches to ensure the cover is tightly closed and will not open accidentally.
8. Test and Inspect the Installation
After completing the installation, conduct a continuity test to verify that all connections are properly made and there are no shorts or open circuits. Visually inspect the installation for any signs of damage, loose connections, or improper sealing.
9. Maintain and Inspect Regularly
Regularly inspect the junction box for signs of wear, damage, or loose connections. Check for any signs of moisture ingress or corrosion. Clean the junction box as needed using a dry cloth or compressed air.
Conclusion: Ensuring Safety and Longevity
By following these best practices for installing waterproof junction boxes, you can ensure the integrity of your electrical connections, safeguard against moisture intrusion, and extend the lifespan of your electrical system. Remember, proper installation and regular maintenance are essential for maintaining the safety and reliability of your electrical infrastructure.
Media Contact
Company Name: Zhejiang Boneng New Energy Technology Co., Ltd.
Email: Send Email
Country: China
Website: https://www.bonengsolarjb.com/